Dongyu Insights
Custom TPR Potato Squishy Design: Surface Map and Sample Approval
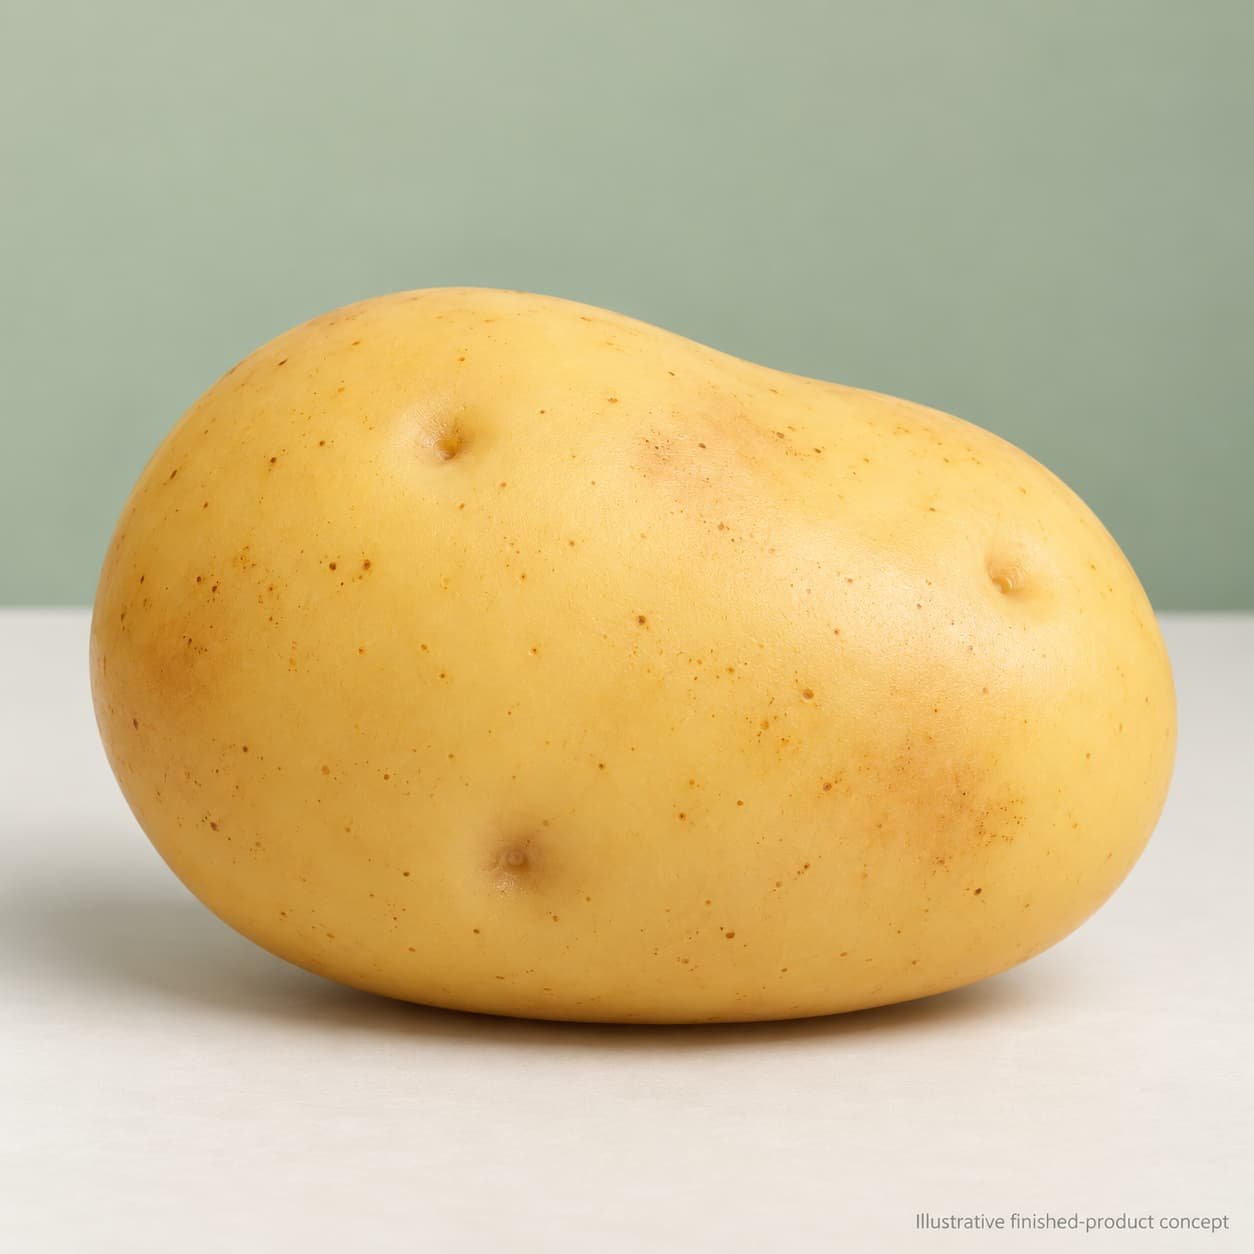
A custom TPR potato squishy can lose its realistic appearance in two opposite ways: every sample may look mechanically identical, or the speckles and patches may vary so much that a batch looks inconsistent. The solution is not to approve every brown dot. Buyers need to decide which shape features are fixed, which decoration features may vary, and how that variation will be judged on physical samples.
This guide develops an original, plain potato concept without a face, feet or sprouts. It separates the body shape, shallow potato-eye details and surface color into a practical approval package. The suggested records are project communication tools, not legal or industrial standards. Engineering values and target-market requirements must be confirmed for the actual construction.
Why consider a realistic potato squishy project?
Research on October 22, 2026 found a potato-themed product carrying a Bestseller label in Faire’s UK potato-squishy directory. That is a platform listing signal, not independently audited sales or proof that a new design will sell. Products in the directory include different constructions and effects; their filling, sound and recovery claims do not define this project.
Dongyu’s realistic potato squishy page lists TPR and describes a yellow body with brown speckles. This provides a relevant sourcing reference, not a complete specification for a new order. Request written confirmation of the proposed formulation, construction, decoration and sampling scope.
Use the category’s common oval shape and natural-looking surface as a starting point. Create original proportions and decoration rather than copying another seller’s exact sculpt, character or packaging.
Build a custom TPR potato squishy design brief
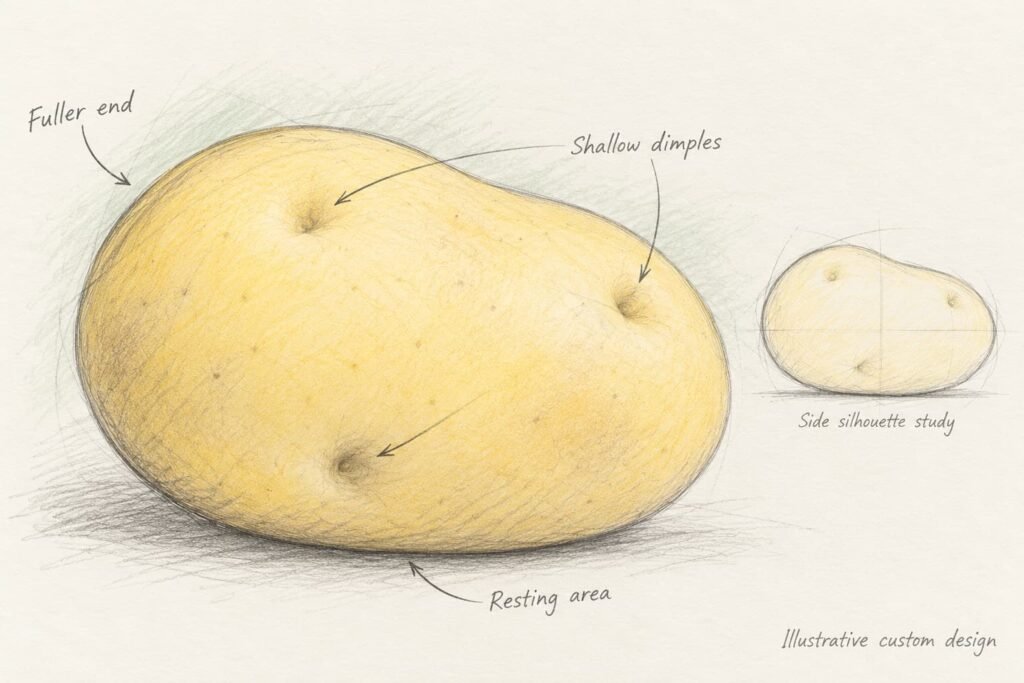
The example is a gently asymmetric, rounded potato with a pale yellow base, restrained brown speckles and a few shallow potato-eye details. Those “eyes” are surface dimples, not cartoon facial features. The illustration proposes appearance only; it does not establish the body’s internal structure or a feasible molding process.
| Brief field | Buyer decision | Approval evidence |
|---|---|---|
| Project identity | PT-01; plain realistic potato; no accessories or character artwork | Scope statement and approved silhouette |
| Envelope | Length L, width W and height H; values pending | Aligned views and agreed relaxed-product measurement method |
| Asymmetry | Intentional fuller end, resting area and main orientation | Annotated outline and reference views |
| Surface details | Location and visual character of shallow potato-eye dimples | Feature register and supplier-reviewed detail |
| Decoration | Base color, speckle character and soft patch shading | Zone map, physical references and acceptable examples |
| Material and experience | TPR direction; construction, filling if any, feel and recovery open | Written proposal linked to an identified sample |
| Commercial program | Quantity, channel, private-label scope and unit packaging | Quotation assumptions and packed sample |
| Market requirements | Destination market and intended user | Applicable assessment and documentation plan |
State what must remain unchanged and what the supplier may propose. Ask which changes use existing tooling and which need development. Price, MOQ, sample cost and timing must be quoted for this scope; a catalog size or another seller’s terms are not your order specification.
Stage 1: sketch intentional asymmetry, not random distortion
Start with a simple outline and mark the fuller end. Add a centerline and the resting orientation. A potato need not be a perfect ellipsoid, but the approved asymmetry should be recognizable across the design files. Otherwise, a supplier may smooth out a feature that the buyer intended to keep.
Use one main study and a small side study. Place the principal dimples lightly, leaving the color decoration for a separate step. If a dimple is purely a painted mark rather than molded relief, identify it that way instead of relying on shading to explain it.
- Keep the body one continuous appearance with no detachable decorative pieces.
- Mark the intended fuller end and resting area.
- Identify the main potato-eye details without assigning unsupported groove depths.
- Keep small speckles out of the geometry sketch so the silhouette remains clear.
The sketch is a direction-setting reference. It cannot confirm wall thickness, closure treatment, mold release or internal construction. Put those questions into the supplier review log.
Stage 2: separate fixed features from controlled surface variation
Use a feature register for the molded appearance
Give each principal dimple a feature ID, such as G01 or G02, and record the view in which it is easiest to locate. Define its position using the approved drawing or model reference rather than the edge of a perspective photograph. Agree with the supplier how feature positions and shapes will be checked.
Do not assume that the visible number of dimples in one illustration equals the total on the whole body. Review the back and resting area too. If the factory proposes simplifying a detail, record the change and its effect on the approved appearance.
Create a speckle map without prescribing every dot
Separate the surface into named viewing zones, for example hero side, opposite side and resting area. For each zone, describe the intended speckle scale, contrast, overall distribution and patch character. These are project labels, not universal inspection categories.
A useful decoration record contains: zone ID, base reference, speckle reference, patch reference, fixed landmarks, permitted variation and approval status. Decide whether a patch must remain in a particular area or whether only the overall balance matters. Do not require exact dot-by-dot matching if the accepted process intentionally produces variation.
Prepare an agreed appearance master plus examples of lighter, darker or more densely decorated outcomes that the buyer is willing to accept. If numerical limits are needed, establish them with a repeatable viewing or measurement method. This guide does not invent a coverage percentage, dot count or color tolerance.
Keep the drawing and color map aligned
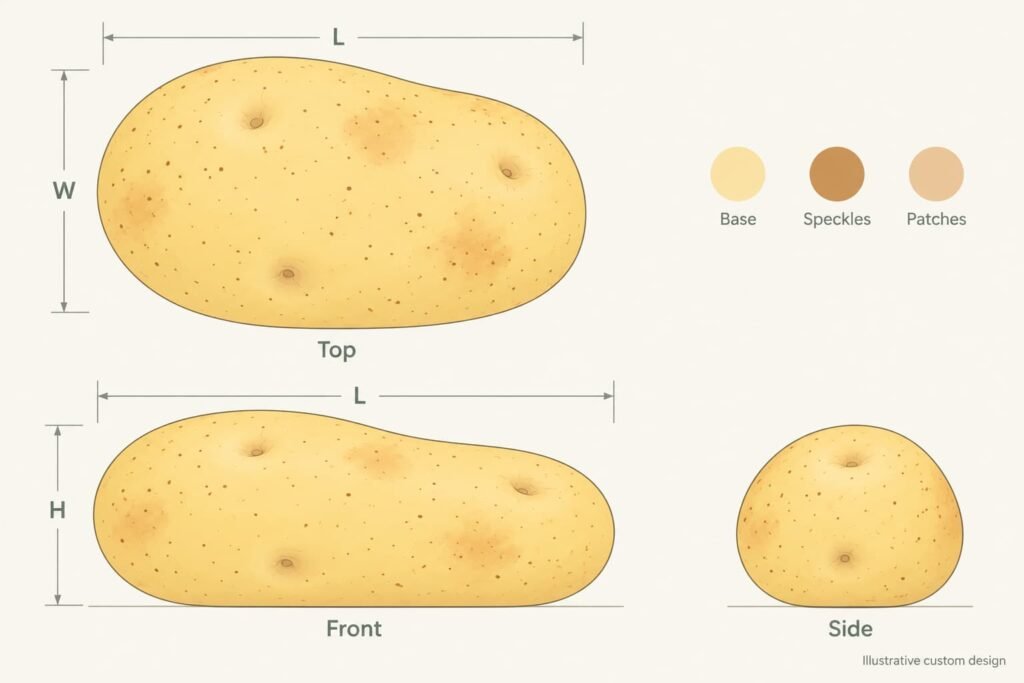
Show Top, Front and Side views with a consistent orientation key. In the top view, L and W describe the envelope; H belongs in an elevation. Define the relaxed, unloaded condition and how the soft product will be measured without unintended compression.
Keep dimple outlines on the geometry layer and speckles on the decoration layer. A dark patch can make a shallow surface look deeply recessed in a render. The two files must say whether that effect is intended, rather than leaving the distinction to the sample maker.
Screen colors and AI images are visual direction, not final physical color references. Agree on suitable references, lighting and review conditions. Use the custom color matching guide for the broader color approval workflow.
Stage 3: inspect the 3D form without decorative shadows
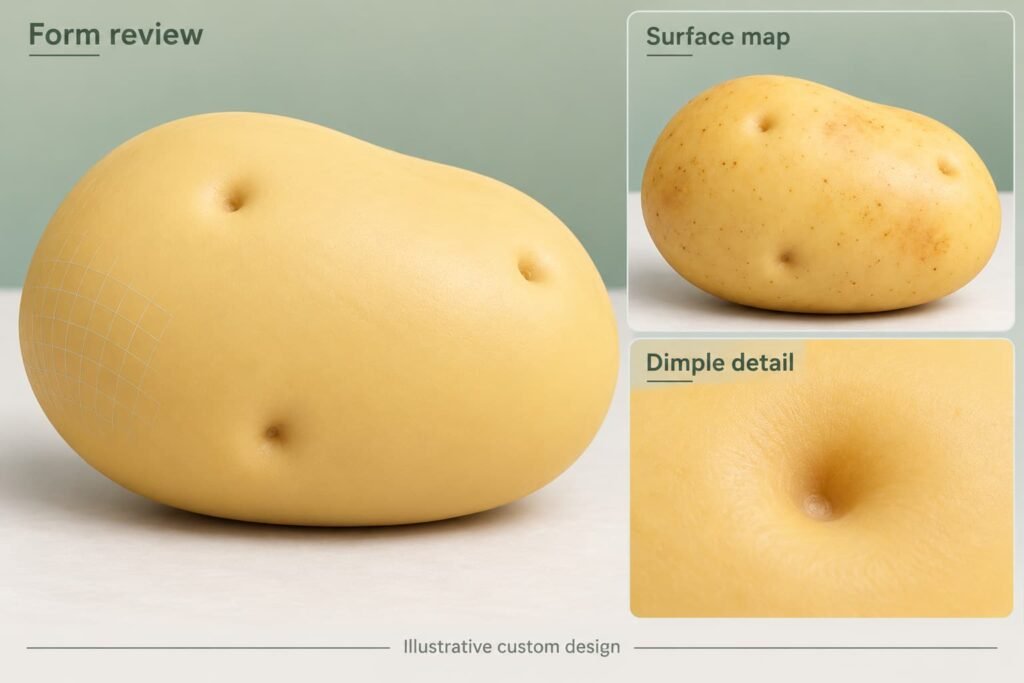
Review an undecorated form study alongside the proposed colored version. Check the fuller end, resting area and shallow dimples. The silhouette should still communicate a potato when the speckles and brown shading are removed.
- Compare the envelope with the approved sketch and aligned views.
- Check that intentional asymmetry has not been flattened away.
- Locate the fixed dimples using the feature register.
- Review the color zones against the same orientation key.
- Ask the supplier to identify proposed seams or closures separately from natural-looking surface marks.
The 3D-style image is illustrative appearance communication, not actual CAD, tooling design or a simulation. Its mesh accent is not evidence that a manufacturing file exists. The finished-product effect is also an AI concept, not a photograph of an approved physical sample.
Confirm construction, feel and decoration together
TPR names a material direction, not a complete product. Ask the supplier to identify the proposed compound and construction, including any filling or closure if applicable. Do not infer an oil, gel, flour or bead filling from the potato shape or from another marketplace listing.
Specify the intended squeeze and recovery experience separately from the appearance. For a repeatable comparison, agree on compression, hold, release and observation conditions, together with acceptance limits. Two casual videos made under different handling conditions do not establish a controlled performance comparison.
Review the decorated sample during and after the agreed handling procedure. Record changes in speckles, patches, finish and the appearance of dimples. If the sample fails the intended appearance requirement, identify whether the next proposal changes the form, decoration or construction rather than simply requesting “better quality.”
Ask about decoration compatibility, surface feel and packaging contact for the proposed system. Do not add a fragrance, coating or filling without a recorded change review. Any claim about safety, certification or performance needs appropriate substantiation for the actual product.
Use a two-part sample acceptance matrix
Separate fixed-feature approval from allowed appearance variation. Before inspection, agree on sample quantities, conditions, references, methods and pass/fail rules. The matrix organizes that conversation; it supplies no invented numerical engineering thresholds.
| Approval item | Evaluation focus | Record needed |
|---|---|---|
| Envelope and asymmetry | Relaxed sample against aligned views | L/W/H results, conditions and agreed tolerances |
| Fixed dimples | Feature register and supplier-reviewed shape references | Positions, appearance limits and disposition |
| Base color | Physical master under agreed viewing conditions | Reference ID and accepted variation |
| Speckles and patches | Zone map, master and accepted variation examples | Distribution decision, exceptions and approver |
| Feel and recovery | Identified samples under the agreed procedure | Method, observations, limits and decision |
| Surface after handling | Decoration and finish before and after agreed handling | Observed changes and acceptance outcome |
| Packed sample | Fit, orientation and contact under agreed distribution conditions | Marking, deformation and pack approval |
| Market requirements | Actual construction, intended user and destination | Responsible reviewer, documents and open actions |
This does not replace a product safety assessment or applicable testing. Include the realistic food-like appearance in the review. Do not take age guidance, warnings or certification claims from a competing toy and apply them to this order.
Keep the approved physical reference and any accepted variation samples identified by revision. The sample approval checklist provides a broader release framework.
Link revisions to private-label packaging
Use separate identifiers for geometry G, decoration A, feel specification F and packaging P. PT-01_G02_A03_F01_P02 is one possible release index, not an industry naming standard. Record what changed, why, who approved it and which physical samples represent the release.
If a fixed dimple moves, review the zone map. If speckle application changes, review the acceptable variation examples. If the compound or finish changes, ask which appearance, handling and packaging checks must be repeated. Approval of one file should not silently approve every related change.
For private-label presentation, keep detailed brand text and barcodes on a suitable package panel unless direct product decoration has been demonstrated. Define the hero side and packing orientation if a window or display exposes only part of the potato. Request a packed sample, not just a box rendering.
Use the branding and packaging guide for general options. In this project, the specific requirement is to preserve the accepted surface appearance through unit packing and the agreed distribution conditions.
Frequently asked questions
Should every potato squishy have identical speckles?
Only if that is an agreed and feasible requirement. Otherwise, define controlled variation using a zone map, appearance master and accepted examples rather than approving individual dots.
Are the potato-eye marks holes?
This concept proposes shallow surface details, not openings. The supplier must confirm their feasible geometry and distinguish them from any required construction opening or closure.
Does TPR determine the filling and recovery speed?
No. Confirm the compound, construction and desired experience separately, then evaluate identified physical samples under an agreed procedure.
Can a supplier quote from a realistic potato reference?
A reference can start the discussion. Add dimensions, quantity, market, intended feel, decoration expectations and packaging scope. Request written assumptions and exclusions.
Request a focused custom TPR potato squishy review
Send Dongyu your sketch, target L/W/H, fixed-feature notes, surface zone map, quantity and target market. Include the appearance variations you would accept and the construction questions you need the supplier to resolve.
Discuss a custom TPR potato squishy with Dongyu Toys before final artwork or tooling approval. Confirm MOQ, price, sampling cost, timing and engineering parameters for the actual project; none are promised by this guide.