Dongyu Insights
Custom Squishy Toy Mold Design: From 2D Artwork to Approved Sample
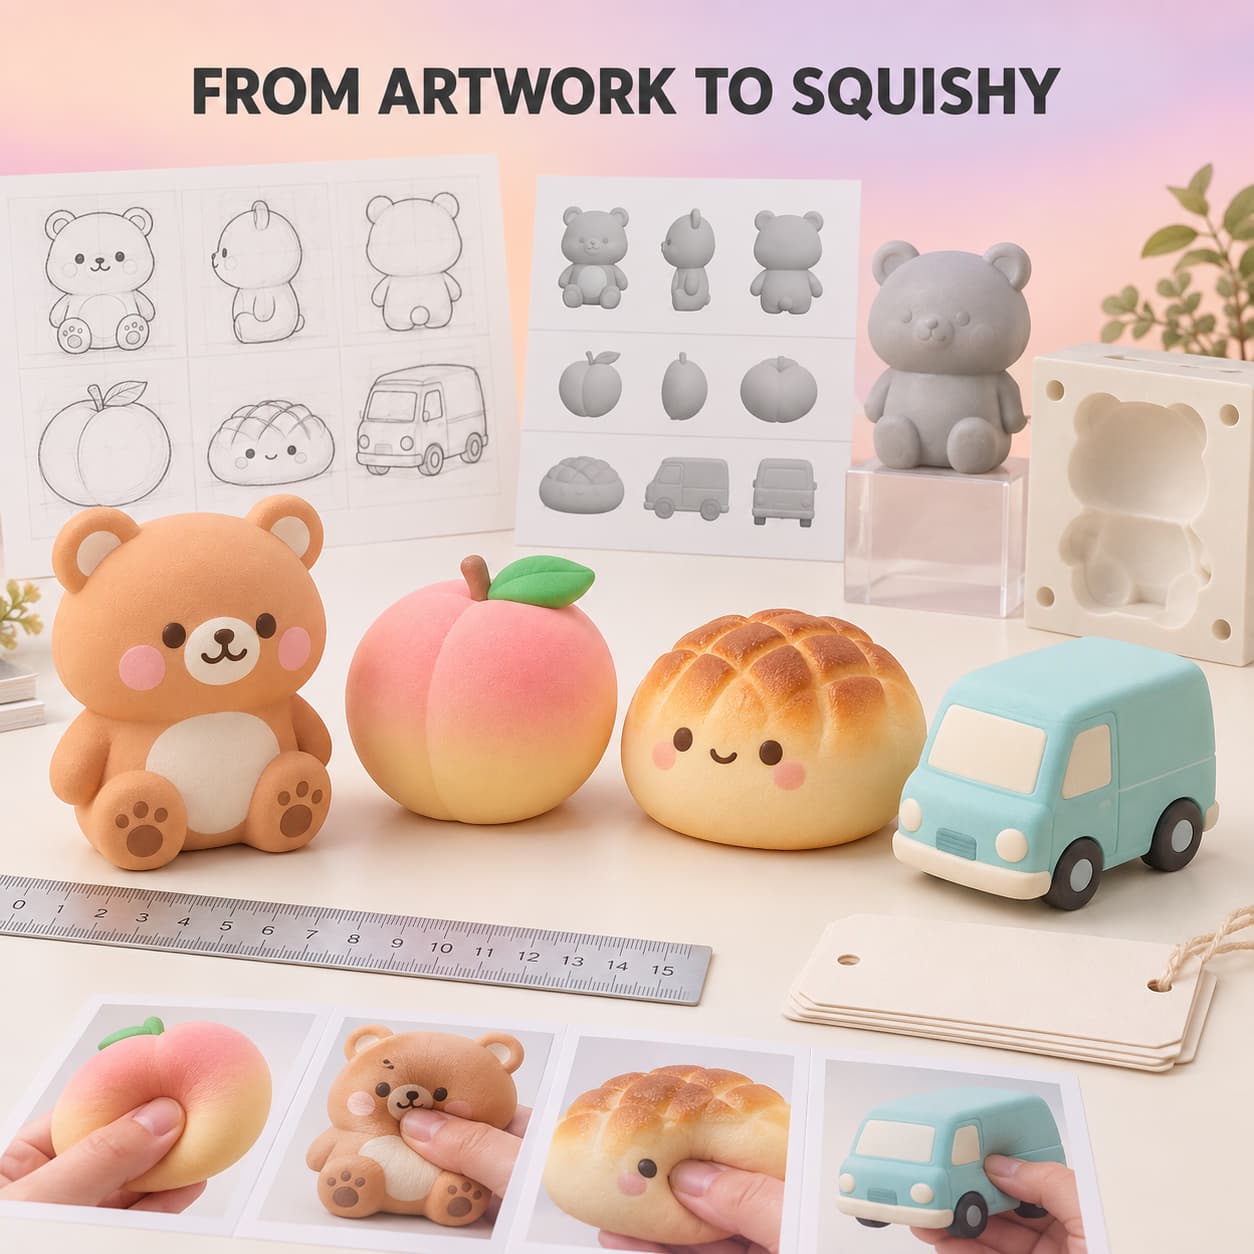
Custom squishy toy mold design begins before any tool is made. A sketch may communicate the character, food, mascot, or promotional product a buyer wants, but it rarely defines the physical object well enough for sampling. The supplier still needs to understand the front, back, side, thickness, scale, squeeze direction, material, surface finish, printed details, packaging, and target market.
For B2B buyers, the most useful question is not simply “Can this drawing become a squishy?” It is “What must change so this design remains recognizable, squeezable, repeatable, packable, and reviewable as a production sample?” This guide explains the decisions between 2D artwork, a 3D model, mold development, the first physical sample, and the final approved reference.
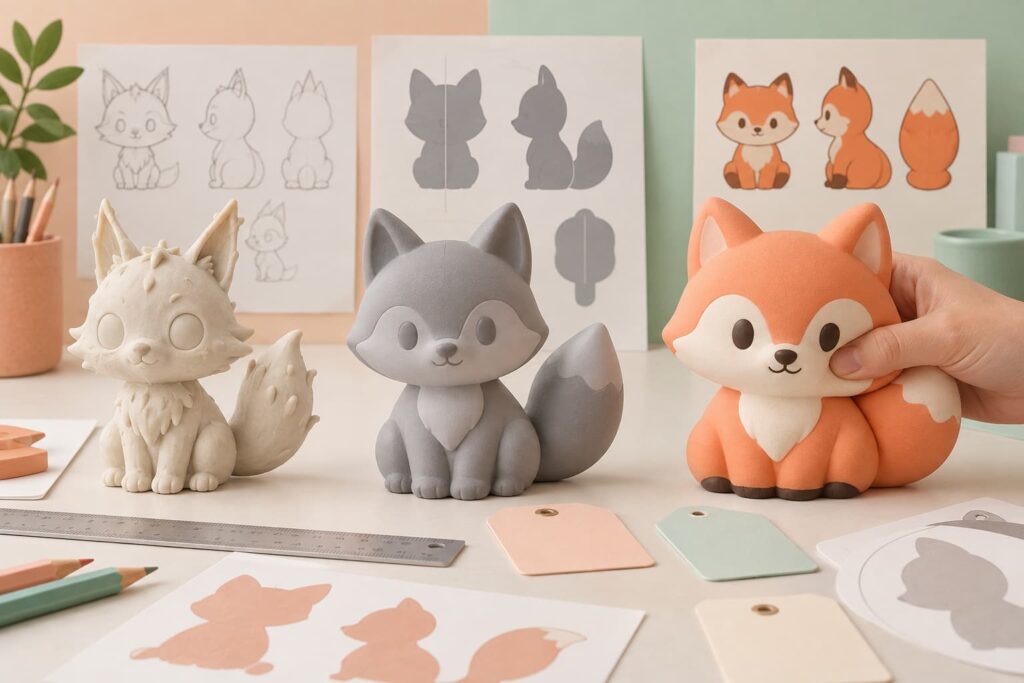
Start by Choosing the Right Customization Route
Not every project needs a new mold. Clarifying the route first helps the buyer compare quotations and approval work on the same basis.
- Existing product with new packaging: the shape and material stay unchanged; the buyer customizes the label, insert, window box, or display.
- Existing mold with new colors or print: the base shape already exists, but colorways, facial details, a logo, or packaging require samples and artwork approval.
- Modified existing shape: selected features change, but feasibility depends on whether the old tooling can support them or a new mold is needed.
- Fully custom shape: the buyer supplies an original concept, authorized mascot, product replica, or sketch that must be converted into a new three-dimensional design.
Ask the supplier to state which route the quotation assumes. A color-and-packaging adaptation is not equivalent to original shape development, and a digital rendering is not the same checkpoint as an approved physical sample.
What to Send With a 2D Squishy Toy Brief
A single front image leaves too many hidden decisions. Whenever possible, send:
- front, side, and back views;
- top or bottom view when the silhouette changes significantly;
- target finished dimensions and preferred orientation;
- material direction such as slow-rising PU foam or a TPR/TPE squeeze style;
- intended hand feel and recovery behavior;
- color references and surface finish;
- molded, painted, or printed details;
- logo artwork and preferred imprint area;
- individual packaging and retail display direction;
- destination market, age presentation, quantity, and launch target.
If only one illustration exists, identify which details are essential and which can be simplified. Mark the exact authorized artwork revision so the supplier does not build a model from an earlier concept. Dongyu Toys’ wholesale customization guide provides a broader checklist for shape, material, packaging, and samples.
Translate Appearance Into a Three-Dimensional Product
The first 3D review should solve questions the drawing cannot answer. How far does the nose project? Is the tail attached to the body or separate? Does the toy sit upright? Is the underside flat? Where can the mold open? How thick are the ears, stems, wheels, toppings, or accessories?
Review the model from more than one attractive camera angle. Ask for front, back, side, top, and perspective views. Check the outline at the intended physical size, not only as a large image on a monitor.
The 3D model is an important communication step, but it still cannot fully prove softness, recovery, surface feel, paint appearance, print adhesion, or package fit. Those attributes require physical sampling on the chosen construction.
Design the Silhouette for Recognition
A successful squishy should remain recognizable from the front of a shelf display and in a small online thumbnail. Start with the major silhouette before adding tiny decoration.
Useful checks include:
- Can the character or product be recognized without color?
- Are the head, body, and key features proportioned clearly?
- Does the outline read from the main retail viewing angle?
- Will printed features stay aligned with the molded shape?
- Does the product have a stable orientation for photography and packaging?
A mascot with ten tiny spikes may look distinctive in an illustration, but a rounded crown or fewer thicker points may communicate the same idea more reliably. Simplification should protect the identity rather than remove it.
Strengthen Thin and Projecting Features
Long ears, narrow stems, antennae, fingers, horns, tails, handles, and layered toppings need special review. They can create weak sections, awkward mold release, paint problems, package pressure points, or inconsistent squeeze behavior.
Possible design responses include:
- shortening or thickening the feature;
- connecting it to the body with a wider base;
- turning a separate element into a shallow molded relief;
- rounding sharp transitions;
- integrating a tail, arm, or accessory into the main silhouette;
- moving fine information to printing or packaging;
- changing the product orientation to protect the feature.
The final choice depends on material, size, mold concept, intended use, and target-market review. Do not copy a fixed thickness rule from an unrelated product. Ask the manufacturer to explain the risk on the specific design and confirm the decision in the approved sample.
Plan Parting Lines and Visible Seams Deliberately
A molded product normally has a location where mold sections meet. The exact tooling and process vary, but the buyer should still review where a parting line or visible seam may appear.
Keep prominent facial features, logo areas, smooth food surfaces, and important color transitions away from likely seam zones when practical. A seam hidden along the back contour may be less distracting than one crossing the eyes or a front logo.
Parting-line planning also affects cleanup and finishing. A complex contour can increase the difficulty of keeping an edge visually consistent. The engineering team should make the final moldability decision; the buyer’s role is to identify which surfaces matter most to the appearance.
Reduce Undercuts and Trapped Geometry
An undercut is a feature that can interfere with a straightforward mold opening or product release. General molding guidance treats undercuts, draft, texture, and release direction as early design considerations. A soft-toy process is not identical to rigid thermoplastic molding, so generic draft-angle numbers should not be copied directly into a squishy specification. The principle still matters: geometry must be designed for the actual material and mold process.
Common review areas include:
- deep gaps between arms and body;
- hooks, curled tails, and enclosed handles;
- overlapping layers that trap the mold;
- very deep facial recesses;
- textured surfaces near the release direction;
- separate parts that create assembly and alignment work.
Some designs can use multiple mold sections, separate components, or a controlled flexible release. Each option may affect tooling, sampling, appearance, cost, and risk. Request a design-specific explanation rather than assuming every complex shape is impossible or automatically acceptable.
Choose Molded, Painted, Printed, or Packaged Detail
Every visual detail does not need to be sculpted into the mold.
- Molded relief: useful for broad cheeks, paws, crust texture, windows, panel lines, or raised logo elements that fit the mold concept.
- Surface paint: useful for color blocks, gradients, bread effects, cheeks, and larger decorative zones.
- Printing: useful for eyes, mouths, patterns, and simplified logos when the surface provides a stable print area.
- Packaging artwork: useful for fine text, complex graphics, instructions, brand stories, and information that should not be squeezed.
A 3D render may show perfect micro-details that become unreadable at palm size. Ask for an actual-size artwork proof and a decorated sample. During custom squishy toy development, approve body pigment, coating, print, and package color as separate physical checkpoints.
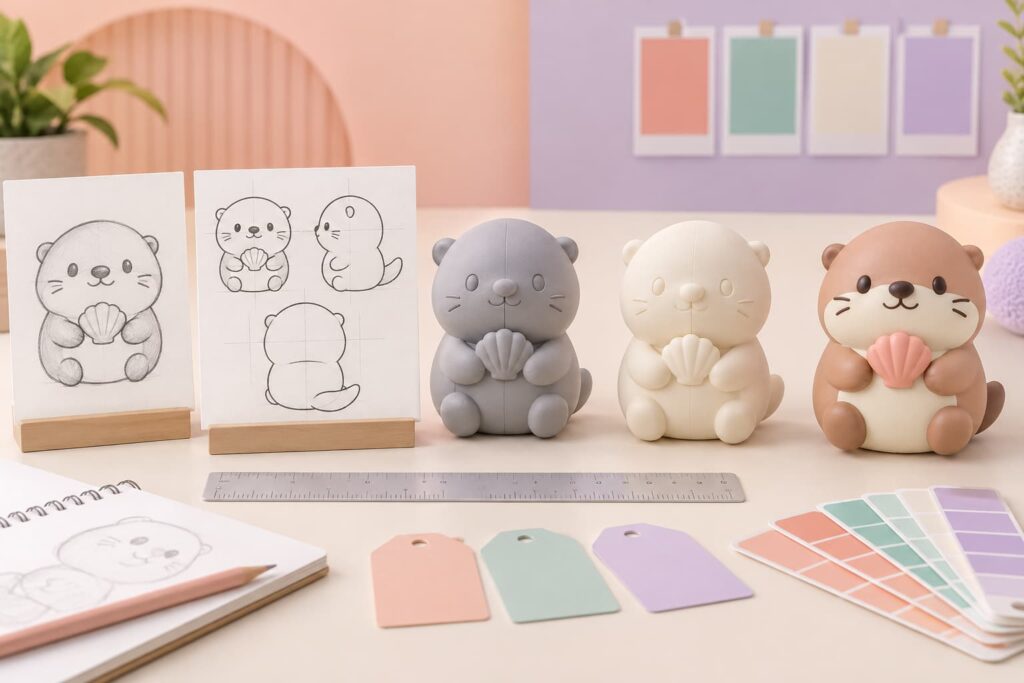
Design a Realistic Logo Area
Promotional buyers often begin with a logo, but a logo alone does not define a usable imprint. Identify:
- the maximum flat or gently curved area;
- actual logo width and height;
- minimum line and gap size after reduction;
- body color and ink contrast;
- distance from seams and molded texture;
- how the print changes when the toy is squeezed;
- whether packaging should carry the more detailed brand version.
For a product replica, the side of a rounded van, carton, bottle, or appliance can provide a practical branding panel. For an animal mascot, a hang tag or window box may preserve the character better than forcing a logo across the face or belly.
Review Size, Weight, Feel, and Package as One System
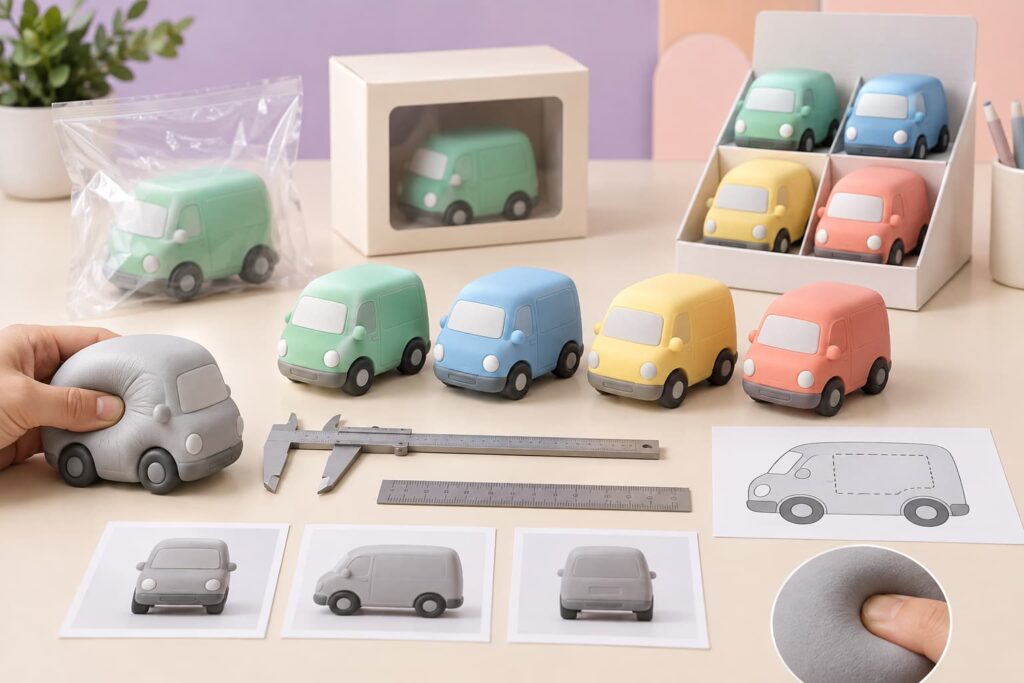
Changing size changes more than the dimension line. It can affect squeeze force, recovery, weight, paint area, print scale, package volume, display count, carton arrangement, and freight efficiency. A jumbo model cannot simply be treated as an enlarged mini sample.
During physical sample approval, record:
- overall dimensions and orientation;
- proportions and visible seams;
- material, density or hand-feel reference, and recovery behavior;
- thin-feature strength and surface integrity;
- color, paint, print, coating, and odor observations;
- logo position and decorated size;
- individual package fit and contact points;
- display quantity, SKU ratio, and carton direction;
- target-market testing, labeling, and traceability plan for the final construction.
Inspection does not replace applicable testing or certification. The U.S. CPSC’s 2026 warning about counterfeit and noncompliant squishy toys highlights tears, leaks, unknown fillings, missing safety information, and other hazards. Buyers should connect the approved design and construction with a product- and market-specific compliance review.
Control Revisions Before Tooling and Production
Name every model and sample revision. A simple record might move from concept A to 3D V1, 3D V2, unpainted sample, decorated sample, and final approved sample. Each approval should state what changed and what remains open.
Do not approve a new color by accidentally accepting an old shape, or approve the shape while assuming the printed face will be corrected later. Separate approval categories can include geometry, dimensions, material/feel, color/finish, printing, packaging, and compliance documentation.
Once the final physical sample is approved, label and retain it as the master reference where practical. If the model, mold, material, supplier, paint process, logo artwork, accessory, or packaging structure changes, document the change and determine whether reapproval is needed.
Protect Original Artwork and Ownership
Only submit designs, trademarks, characters, photographs, and product references that you own or are authorized to use. A market image can communicate category, scale, or hand feel, but it should not become instructions to duplicate another company’s protected product.
Before paying for custom development, clarify in writing:
- who owns the original artwork and 3D files;
- who pays for and owns the mold;
- where the mold is stored and how long;
- whether the design can be sold to other buyers;
- what happens if tooling needs repair or replacement;
- which files and samples will be returned or retained.
Terms vary by project and supplier. Obtain written commercial and legal advice appropriate to the transaction rather than relying on assumptions or a generic website statement.
RFQ Checklist for a New Squishy Toy Mold
Send these items for a more useful feasibility review and quotation:
- original concept and authorized artwork;
- front, back, side, and top views where available;
- target dimensions and sales channel;
- material and hand-feel direction;
- essential features and areas that may be simplified;
- molded, painted, and printed detail plan;
- logo size and file format;
- colorways and assortment ratio;
- individual packaging, display, and carton direction;
- target market, age presentation, and known testing needs;
- estimated quantity, destination, sample process, and launch target.
Review Dongyu Toys’ sampling and production process and product directions before sending the brief. Final mold feasibility, pricing, MOQ, schedule, material, packaging, and testing requirements must be confirmed for the exact design.
Frequently Asked Questions
Can a single front drawing be used to make a custom squishy toy?
It can start the discussion, but additional decisions are required. The supplier needs enough information to define the side, back, thickness, dimensions, material, seams, colors, decoration, and package. Multi-view artwork reduces interpretation risk.
Do I need a new mold for custom colors or a logo?
Not always. An existing shape may support new colors, printing, labels, or packaging. A new mold may be required when the geometry, molded logo, proportions, or structural features change. Ask the quotation to identify the assumed route.
Why does a supplier simplify my mascot design?
Thin ears, fingers, tails, spikes, and deep gaps can create mold-release, strength, decoration, package, or squeeze problems. A good revision preserves the mascot’s recognizable silhouette while making fragile details thicker, shorter, integrated, printed, or transferred to packaging.
Should I approve the 3D model before a physical sample?
Yes, as a geometry checkpoint, but do not treat it as final product approval. The physical sample is still needed to review feel, recovery, surface, paint, printing, seams, dimensions, and packaging fit.
Who owns the custom squishy toy mold?
Ownership is a commercial term, not an automatic rule. Confirm the tooling payment, ownership, storage, exclusivity, maintenance, transfer, and end-of-life arrangements in writing before development.
What should the final approved sample control?
State it explicitly. It may control geometry, dimensions, material/feel, color, gradient, print, coating, logo placement, package fit, and artwork revision. It does not prove compliance unless the final tested product and documentation match the approved construction and applicable requirements.
Turn the Drawing Into a Controlled Product
The best custom squishy toy mold design keeps the idea recognizable while removing unnecessary production risk. Start with clear multi-view references, review the three-dimensional silhouette, strengthen fragile details, plan seams and decoration, approve a real sample, and lock each revision before bulk production.
Have an original mascot, food shape, product replica, or promotional concept? Send Dongyu Toys your authorized artwork, target size, material direction, quantity, package, destination, and launch goal through the inquiry form. A complete brief makes the first OEM/ODM feasibility review and sample discussion more useful.