Dongyu Insights
Custom PU Corn Squishy Design: Kernel Rows, Taper and Sample Approval
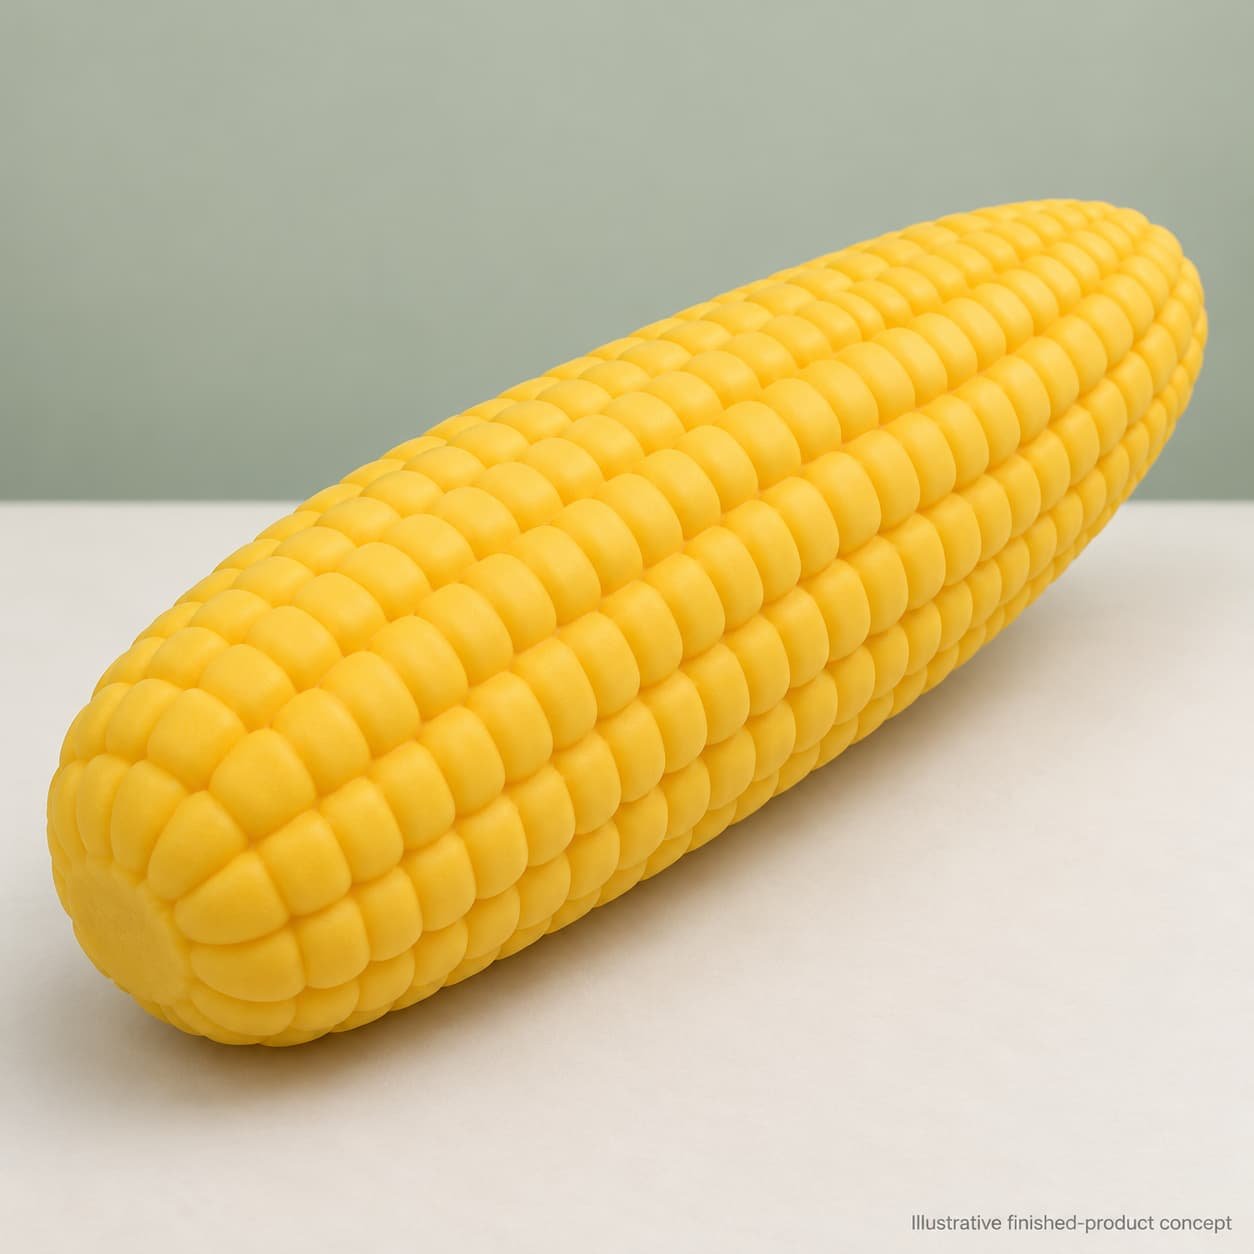
A custom PU corn squishy can be recognizable at a glance yet difficult to approve from a picture. The yellow color is straightforward; the harder questions are how the kernel rows wrap around the cob, how they become smaller at the tip, and what changes are acceptable after the product is squeezed.
This guide develops an original bare-cob concept without husks, a face, a stick or detachable decoration. It provides a design brief, a kernel-layout register, drawing annotations and a sample acceptance matrix for wholesale buyers and private-label teams. These are project communication tools, not legal or industrial standards. Production dimensions, material behavior and inspection limits require agreement with the supplier.
Use market evidence without copying a competitor’s product
On October 21, 2026, the public Faire corn-squishy directory displayed Bestseller labels beside corn-themed products. That is a platform merchandising signal, not independently audited sales or proof of worldwide popularity. Listings in the category use different constructions; their sound, filling and recovery claims cannot be transferred to a new design.
Dongyu’s corn squishy product page provides a relevant sourcing starting point, while its custom service includes PU foam development. Confirm the compound, construction and customization scope for your own project. Neither a promotional picture nor a similar marketplace item replaces a written specification.
The transferable category cues are an elongated cob, rounded kernels, longitudinal rows and a yellow palette. Create your own proportions and kernel layout. Do not reproduce another seller’s exact sculpt, character, distinctive decoration or packaging.
Write a custom PU corn squishy design brief
For this concept, the whole cob is one proposed foam body. The kernel pattern is surface relief, not a collection of separate kernels. The top is gently rounded and tapered; the bottom has an integrated resting area, not a rigid inserted stem. These choices define the appearance direction, not a claim that engineering approval has already been completed.
| Brief field | Buyer decision | Required approval reference |
|---|---|---|
| Project identity | CN-01; bare cob; no removable parts or added accessories | Approved sketch and scope statement |
| Envelope | Overall length L, maximum width W and thickness T; values pending | Dimensioned relaxed-product views |
| Kernel layout | Longitudinal row scheme and kernel shape family | Layout register linked to the model revision |
| Tip and base | Rounded taper, row termination and resting orientation | Detail views and supplier feasibility response |
| Color and finish | Warm maize yellow with a soft matte appearance | Identified physical references and decorated sample |
| Material and feel | PU foam direction; squeeze and recovery requirements open | Written supplier proposal and physical sample |
| Commercial scope | Quantity, selling channel, pack format and branding | Quotation assumptions and packed sample |
| Market requirements | Destination market and intended user | Applicable review and documentation plan |
Ask the supplier to identify which features use existing tooling and which require new development. Keep MOQ, sample cost, tooling cost, lead time and production availability as quotation questions. A specification from a different listing is not a promise for this project.
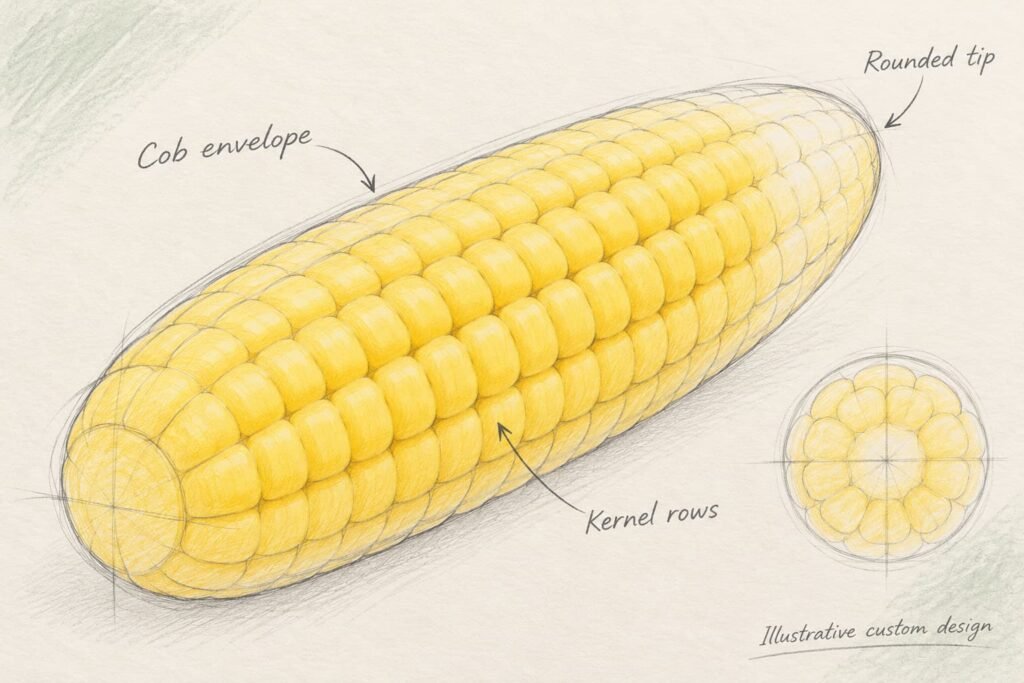
Stage 1: sketch the cob before drawing every kernel
Start with the outer envelope. Mark the widest region and the points where the body begins to taper. A natural reference may have irregularities; decide which ones are intentional design features and which should be simplified. Do not leave the supplier to guess whether an uneven outline is deliberate.
Show the product lengthwise and include a small end study. The end view explains the cross-sectional envelope; it should not repeat the full cob silhouette. If the product has a preferred resting orientation, identify the resting surface in the sketch.
- Use light construction lines to show the long axis and main proportions.
- Indicate representative rows instead of filling the page with tiny repeated details.
- Circle the tip and base as separate review zones.
- Label the kernel texture as continuous surface relief on one proposed body.
At this stage, the key question is whether the simple shape reads as a corn cob. Added detail should clarify that identity, not hide an unresolved silhouette.
Stage 2: create a kernel-layout register and colored views
Give rows a reference system
A perspective image only shows part of the circumference. It cannot establish the total number of rows around the product. Define a reference row or a reference meridian in the design file, then identify the surrounding rows in a layout record. The exact count should be agreed after the intended size and supplier review are available.
A practical record can contain these columns: row ID, angular or model reference, central-zone kernel count, tip treatment, base treatment, and approval status. For example, R01 identifies a row in the project file; it does not prescribe a universal row count or production method.
For the central zone, specify whether the rows should look regular or intentionally offset. Do not describe the pattern simply as “realistic.” Provide a close-up reference and note which features matter: rounded rectangular crowns, shallow separations, consistent visual spacing, or a particular degree of natural variation.
Resolve the taper rather than shrinking a grid blindly
Draw a tip detail showing how the visible rows converge and finish. The artwork should not imply needle-like kernels at the apex or isolated tiny pieces. Ask the supplier to propose a feasible transition and show it in the model. The illustration alone does not establish a suitable groove depth, edge radius or material thickness.
At the base, decide where the last complete kernel band ends and how it meets the resting area. Keep the base and tip as separate callouts. A uniform texture copied over the entire surface can miss both of these design decisions.
Align the three views and keep color separate
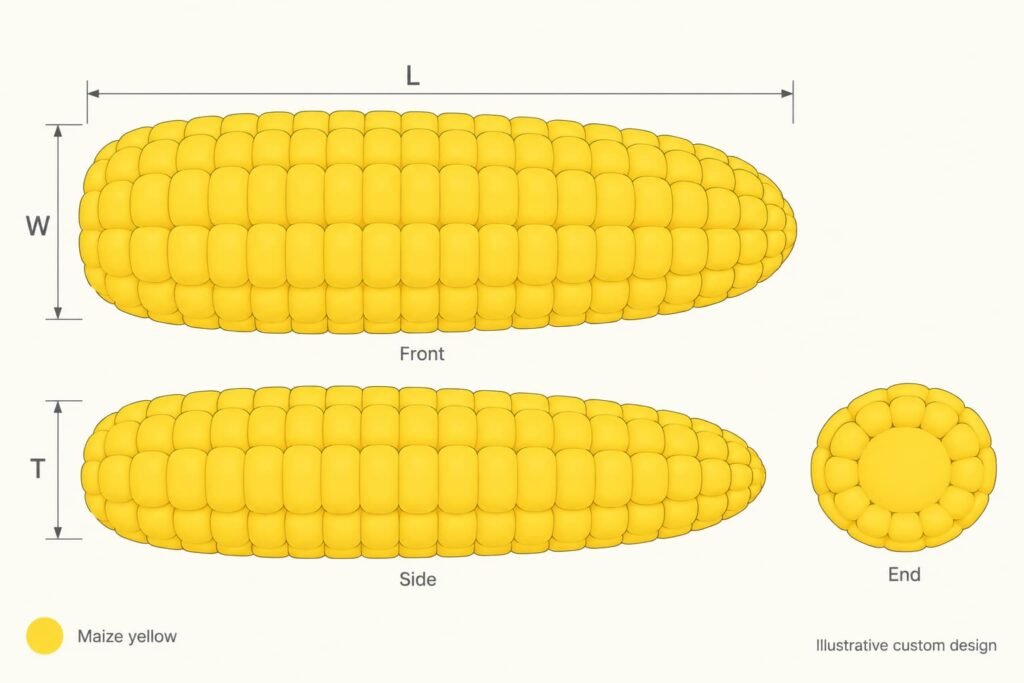
Use Front, Side and End views with a consistent long-axis orientation. In the front view, L spans the full cob and W marks its maximum width. In the side view, T describes thickness. Agree on the relaxed, unloaded measurement condition and how to avoid compressing the soft surface during measurement.
Use geometry notes G01, G02 and G03 for envelope, kernel relief and taper. Use C01 for the yellow appearance reference. These codes are a suggested project convention, not standardized engineering symbols. Keep color on a separate layer so painted shadows do not become mistaken for molded grooves.
Define the physical color reference and evaluation conditions with the supplier. A screen image can communicate direction, but it is not the final appearance master. If printed branding is required, request a decoration proposal rather than placing small lettering across the kernels without a feasibility sample.
Stage 3: review the 3D kernel pattern from more than one angle
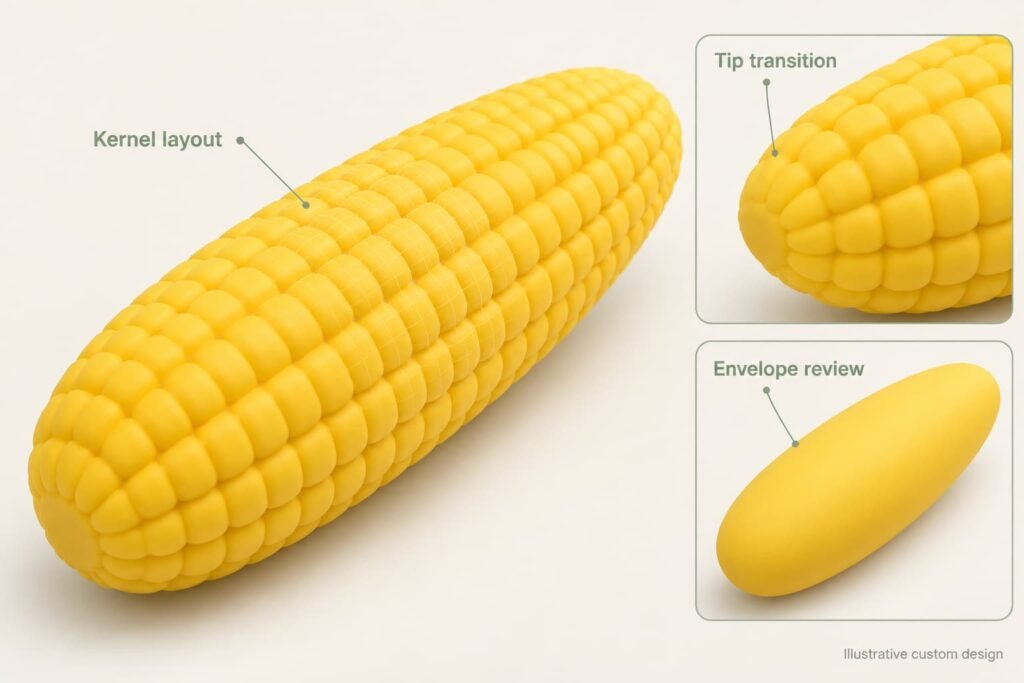
Inspect an unpainted form study before reviewing the final yellow render. This separates genuine relief from lighting and color. Look at the widest section, the row transitions at the tip, and the termination near the base. A close-up can make the grooves appear deeper than they are, so compare it with the annotated drawing.
- Check the overall envelope against the approved sketch.
- Check that the visible pattern corresponds to the agreed row reference system.
- Inspect the tapered tip for abrupt pattern changes or unresolved small features.
- Review the base transition and intended resting orientation.
- Record supplier-proposed tooling seams separately from decorative row grooves.
Request the supplier’s engineering feedback before treating the form as approved. The accompanying 3D-style image is illustrative communication, not actual CAD, a tooling design or a simulation. Its subtle mesh styling does not prove that a manufacturing model exists.
Confirm the PU feel and surface behavior on samples
Describe the desired squeeze experience separately from the appearance. PU is the chosen material direction, but this guide assigns no formulation, recovery time or durability result. Ask the supplier to propose an appropriate sample and document the construction being evaluated.
For a repeatable recovery comparison, agree on the compression method, hold period, release method, observation conditions and acceptance limits. Keep those details with the sample record. Avoid comparing two videos made under different handling conditions and calling the result a controlled test.
Inspect the kernel relief before and after the agreed handling procedure. Record whether the sample returns to the accepted appearance and whether surface changes remain within the agreed limits. Do not invent cycle counts or treat an AI image as evidence of performance.
Scent, coatings and special effects are separate options. They should not be added automatically because the toy resembles food. Confirm whether each proposed change affects appearance, feel, packaging contact or the required documentation.
Use a corn squishy sample acceptance matrix
Before evaluation, agree on inspection quantities, conditions, references, methods and pass/fail criteria. The matrix below organizes the decision; it intentionally leaves numerical thresholds to the buyer-supplier approval process.
| Item | Evaluation focus | Record before approval |
|---|---|---|
| Envelope and taper | Relaxed sample against aligned views and agreed measurement method | L/W/T results, conditions and tolerances |
| Kernel rows | Central pattern against the row register and detail reference | Row mapping, visual spacing and deviations |
| Tip transition | How rows converge and terminate at the rounded end | Approved detail and unacceptable departures |
| Base and seam appearance | Resting area and supplier-proposed tooling seam treatment | Locations, appearance limits and disposition |
| Color and finish | Physical reference under agreed viewing conditions | Reference ID, accepted variation and finish |
| Feel and recovery | Identified samples using the agreed handling procedure | Procedure, observations, limits and decision |
| Packed product | Fit, surface contact and orientation under agreed distribution conditions | Marking, deformation and pack approval |
| Market requirements | Actual construction, intended user and destination market | Responsible review, documents and open actions |
This matrix does not replace a safety assessment or applicable testing. Include the realistic food-like appearance in the requirement review, and do not inherit age guidance, warnings or certification claims from a competing item.
For the overall release workflow, use the custom sample approval checklist. Keep an identified physical reference sample when appropriate, together with the approved drawing and construction record.
Connect geometry revisions with private-label packaging
Separate geometry G, texture layout TX, color C, feel F and packaging P in the release index. CN-01_G02_TX03_C01_F01_P02 is an example naming convention, not an industry requirement. Record the date, owner, approval status and reason for every revision.
If the cob becomes slimmer, revisit the row mapping and package fit. If the tip changes, review the local pattern again. If the kernel relief changes, review the decorated sample and packaging contact. A release index prevents an approved body from being paired with an outdated texture or tray.
For private-label presentation, use packaging to carry small text, barcodes and detailed brand information unless a direct-print sample has been approved. Specify how the cob is oriented in the unit pack and display. A header or box window should not hide the main texture that explains the product.
Request a packed sample and assess surface contact rather than approving a carton render alone. Broader artwork choices belong in the logo and packaging guide; this article applies them to one corn design.
Frequently asked questions
Can a supplier quote from a corn squishy photo?
A photo can start the conversation. Add target dimensions, quantity, market, material direction, desired feel and packaging scope. Ask the supplier to state assumptions and what requires new development.
How many kernel rows should the design have?
There is no row count prescribed by this guide. Agree on the intended size, appearance and feasible pattern with the supplier, then record the approved count and mapping in the project files.
Are deeper grooves automatically better?
No. Depth is only one part of the appearance and handling brief. Review the whole profile and obtain supplier advice rather than treating a dramatic rendering as a production specification.
Does the concept include peelable husks or crunchy filling?
No. This project proposes a bare-cob PU form. Other marketplace constructions do not define this product; adding an interactive feature would require a revised brief and separate approval.
Send a focused custom PU corn squishy inquiry
Prepare the sketch, row-layout notes, target L/W/T, quantity, destination market and packaging direction. Highlight the features that must stay and the engineering parameters you need the supplier to propose.
Discuss a custom PU corn squishy with Dongyu Toys and request a feasibility response before final artwork or tooling approval. The four accompanying images show illustrative design stages, not completed physical samples. Confirm all commercial terms and engineering details for the actual order.