Dongyu Insights
Custom PU Pumpkin Squishy Design: Grooves, Face Artwork and Sample Approval
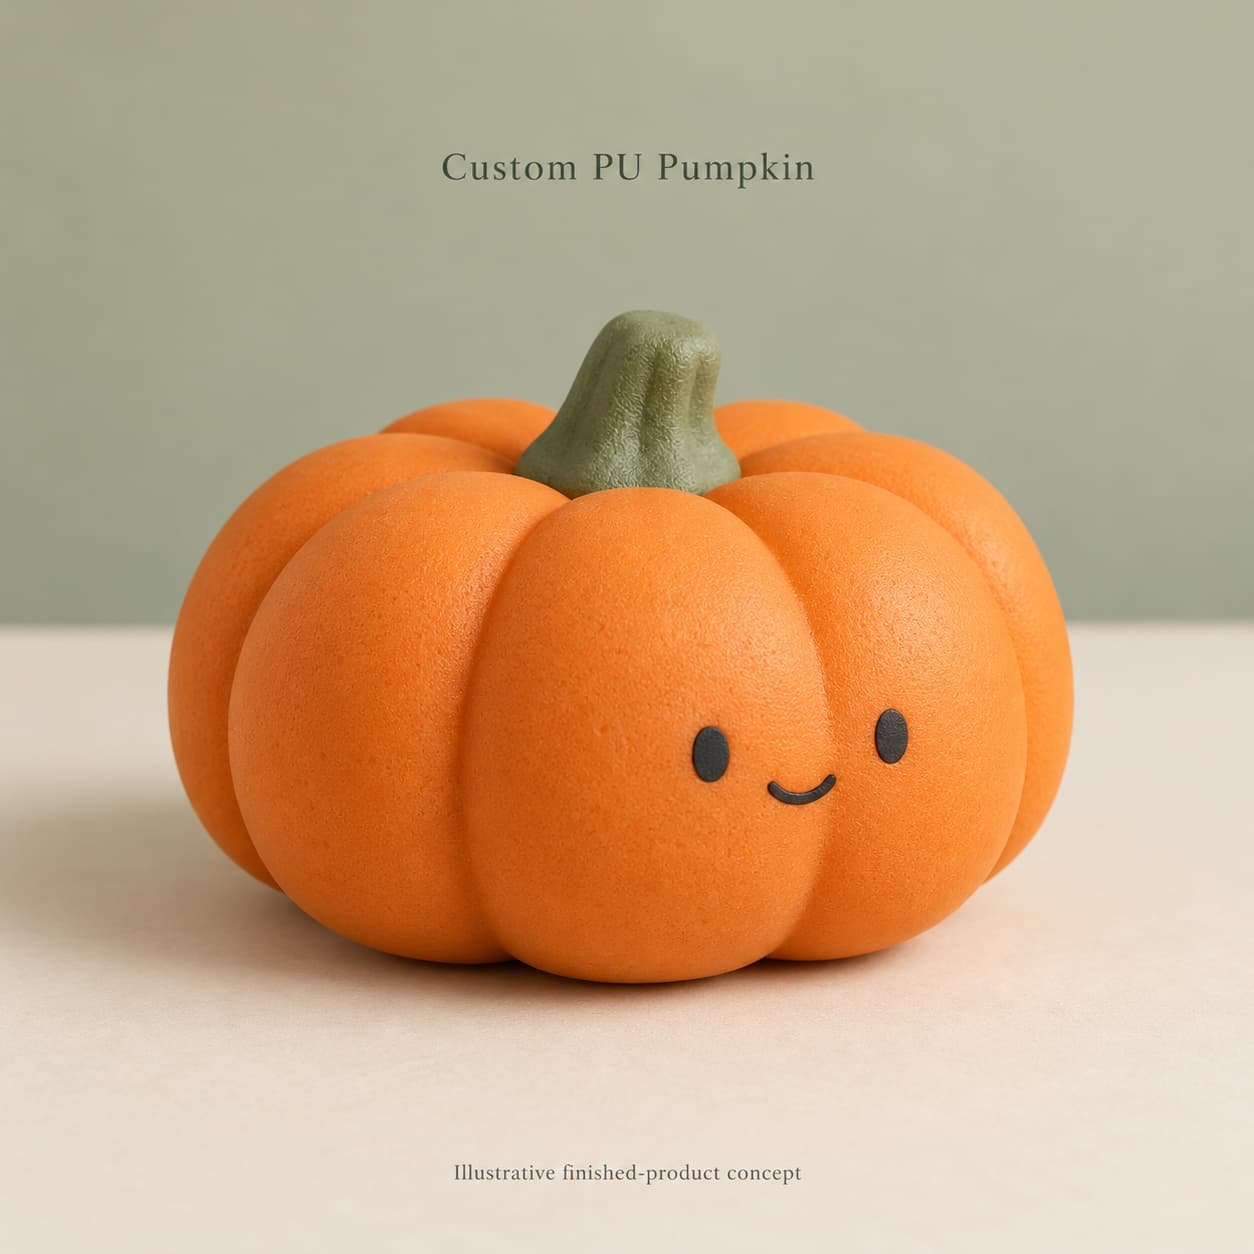
A custom PU pumpkin squishy can look convincing in a rendering yet still arrive with the wrong groove pattern, a rotated face or a stem that presses against the retail pack. Buyers need a clear way to approve the relationship between shape, decoration and packaging, not just an attractive orange image.
This guide follows one original pumpkin concept through sketch, colored design, 3D appearance review and physical-sample approval. The proposed direction is PU foam with a short stem and simple facial marks. It is not a material comparison. The illustrations are AI-generated concepts, not completed samples, engineering CAD files or evidence of performance.
Start with a specific pumpkin product brief
Pumpkin-shaped squeeze products are visible in seasonal wholesale and promotional catalogs. Public search results for Funteze’s Halloween Pumpkin Squishy Ball on Faire show a Bestseller label. That is a platform merchandising signal for that listing, not independently audited demand for PU pumpkins. The product’s construction cannot be inferred from the label.
Separately, JNJ Promos describes a polyurethane foam pumpkin with decoration options. This supports a commercially existing category, not a promise about Dongyu’s recipe, tooling or order terms. Dongyu’s Halloween pumpkin product direction provides a relevant starting point; confirm the proposed PU construction for your own project.
A seasonal reference is a design input, not a reason to rush an unapproved order. Agree a launch calendar after engineering, sampling, packaging and logistics have been reviewed. Do not assume a new custom development can meet the nearest Halloween selling date.
Copy this brief into your inquiry
| Field | Buyer input | Supplier confirmation required |
|---|---|---|
| Project | PKN-01: squat pumpkin, eight broad lobes, short stem, no opening | Available-form adaptation or new tooling |
| Material and feel | PU foam direction; reference feel and recovery preference | Formulation, skin/finish and evaluation conditions |
| Size | Preferred width, depth, total height and body height, with units | Feasible dimensions and agreed tolerances |
| Decoration | Orange body, sage stem, two oval eyes and a curved smile | Color references, application method and placement capability |
| Packaging | Unit pack, display direction, face visibility and brand artwork | Clearance, surface compatibility and packed-sample validation |
| Commercial scope | Quantity by variant, destination, intended users and channel | Quotation, minimums, schedule and required documentation |
Mark each field as requested, proposed or approved. Leave unknown engineering values visibly pending rather than borrowing measurements or order conditions from another supplier’s catalog.
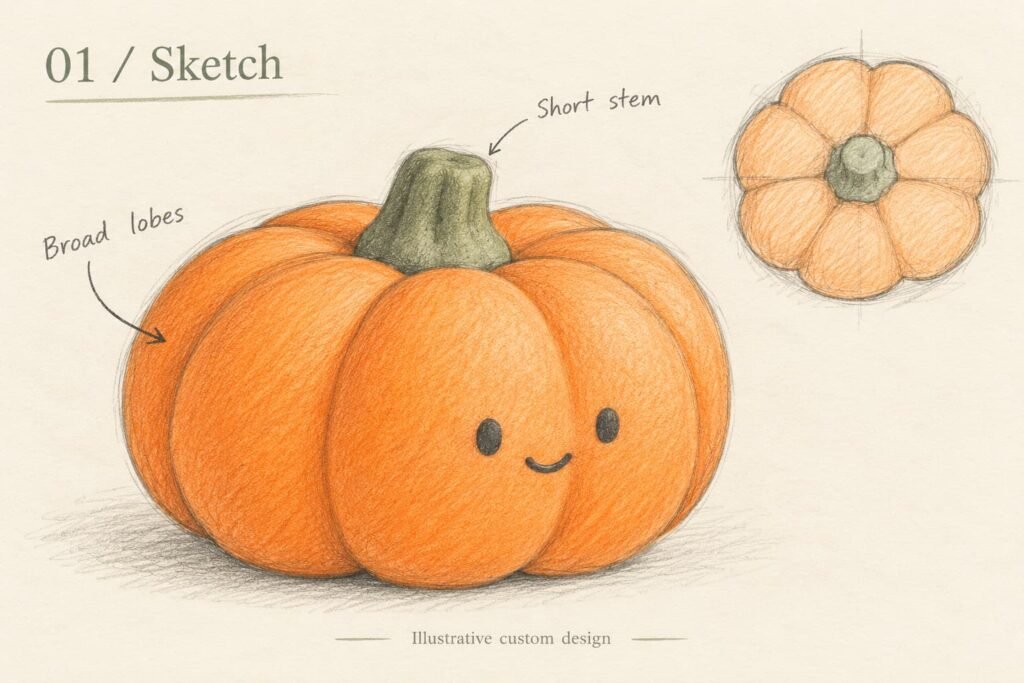
Stage 1: Draw the silhouette and groove rhythm
Begin with a broad, low pumpkin body and a short stem. Select the outline before adding facial detail. A taller body, deeper top depression or narrower base can change the character even when the maximum width remains unchanged.
Use a top sketch to show the intended eight-lobe arrangement. In the front view, only some lobes will be visible; do not count visible vertical lines as the total lobe count. Number the lobes on the working drawing if necessary, and nominate the front direction so later artwork cannot rotate around an otherwise repetitive form.
Define a small feature register
- L1: the nominated front lobe or front-facing region used to orient decoration.
- G1: the agreed groove path and transition near the top.
- S1: short stem and its blended root.
- B1: the standing base and its intended contact region.
- F1: the complete facial artwork group, separate from molded geometry.
The register prevents vague comments such as “make it cuter” from becoming tooling instructions. A revision should name the feature and intended change: for example, soften G1’s top transition without increasing total height.
Keep grooves shallow in the initial appearance concept, then ask the supplier to assess depth, radii and tooling implications. There is no universal groove depth or stem minimum that can be responsibly specified from an AI illustration.
Stage 2: Connect three-view artwork to measurable landmarks
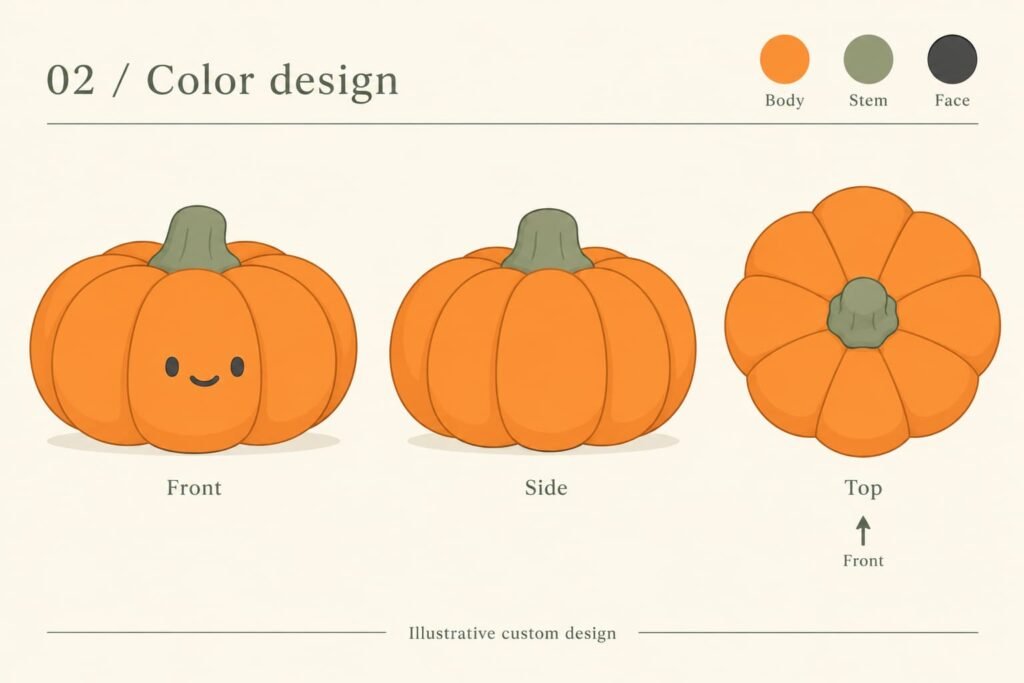
Prepare front, side and top appearance views of the same design. The top view explains lobe arrangement; the side view explains body depth, stem profile and base. It should not simply repeat the frontal illustration with a different label.
For measurement, distinguish total height H, including the stem, from body height Hb. Record maximum width W and maximum depth D in the nominated orientation. A pumpkin is not necessarily circular in plan, so one diameter value may hide a different front-to-back dimension.
Specify that the sample is measured relaxed and uncompressed using an agreed method. Record units, included features and the supplier-confirmed acceptance limits. Any dimension shown on a later technical drawing must be reconciled with the selected appearance revision.
Register the face, not just its center
A center point alone does not control a face. Supply the entire artwork group and identify its width, vertical position, orientation and relationship to nearby grooves. Use a nominated front centerline and a defined base reference for placement; avoid relying on an unlabeled photograph.
Check whether each eye and the smile cross a groove. If they do, ask how the selected decoration process will reproduce the mark on that surface. Moving the group, reducing its width or changing the groove layout are different revisions and need different approvals.
The illustrated oval eyes and smile communicate appearance only. Do not treat apparent thickness in a render as permission to mold raised features or attach separate pieces. State the proposed decoration method and approve its result on a physical sample.
Keep geometry and color decisions separate
Use three named color zones: body, stem and face. Approve physical color references and the intended surface finish alongside placement. A darker groove in a shaded image may be lighting rather than an instruction to paint an extra color.
Provide decoration artwork separately from shaded presentation images. For print or painted marks, ask the supplier which file type, minimum detail and registration allowance suit the actual PU finish. General branding decisions belong in the custom logo and private-label packaging guide; the pumpkin sheet should define this specific project’s placement.
Stage 3: Use 3D review to find conflicts
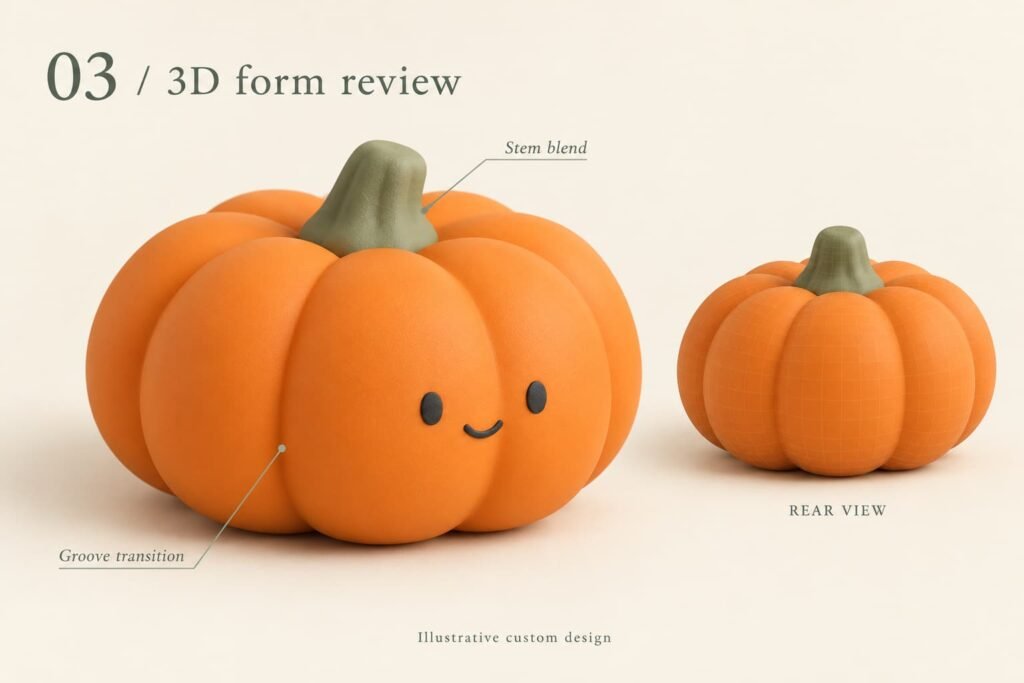
Review a front three-quarter concept and a rear view together. The rear view should show whether the groove layout continues consistently and whether the base and stem remain aligned. It is also a useful place to discuss a possible seam or finishing area, but not to invent a final process location without supplier input.
Ask the factory to review the stem root, groove transitions, top depression, base and any proposed decoration contact area. Confirm what the selected manufacturing route can reproduce and whether an appearance change is needed. If tooling requires a change, update the design sheet before approving the engineering version.
An AI 3D appearance image has no verified draft, shrinkage allowance or manufacturing geometry. A decorative mesh overlay is not a CAD deliverable. Request the supplier’s appropriate engineering information and identify which approved document controls tooling.
- Does the short stem blend smoothly into the body without an unintended thin neck?
- Are the grooves still shallow transitions rather than cut-through openings?
- Does the base support the intended display orientation when the sample is relaxed?
- Can the face be applied consistently on the proposed surface?
- Where should visible process marks be reviewed on the physical sample?
Control variants with an artwork-to-sample register
A new face on an unchanged pumpkin is an artwork variant; a different groove layout is a geometry revision. Keep those changes separate. This makes it easier to compare quotations and understand whether a variation affects tooling, decoration setup or packaging.
Use identifiers such as PKN-01-GEO-R02, PKN-01-FACE-A-R01 and PKN-01-PACK-R01. Link every sample ID to the geometry, decoration and pack revisions it represents. A sample marked “R01” without that link does not establish which design was manufactured.
For each change, record the old condition, proposed change, affected documents, approver and unresolved questions. Use separate approval gates for appearance selection, engineering review, physical sample approval and production release. A buyer’s approval of a sketch must not silently become permission for bulk production.
Set a pumpkin-specific sample acceptance matrix
Agree methods and acceptance criteria with the supplier before reviewing results. This matrix is a buyer planning tool, not a legal or industrial standard, laboratory protocol or claim of testing. Use it alongside the broader sample approval checklist.
| Item | Evidence to review | Decision to record |
|---|---|---|
| Body and groove layout | Relaxed sample, nominated views and agreed measurements | W/D/H/Hb results; accepted outline and lobe variation |
| Stem and top transition | Close photographs and agreed handling evaluation | Accepted geometry and condition after evaluation |
| Face registration | Artwork group against nominated centerline and groove landmarks | Placement allowance, orientation and approved reference |
| Color and surface | Physical color reference; surface before and after agreed handling | Accepted finish, marking performance and cosmetic variation |
| Feel and recovery | Agreed compression, release and observation conditions | Recorded result and acceptable range for this construction |
| Standing and packaging | Sample on intended display surface and after agreed packed evaluation | Accepted standing behavior, stem clearance and surface condition |
Do not approve an unmarked sample as proof that the decorated version is ready. Similarly, a good loose sample does not confirm its condition after packing. Retain a traceable approved reference and identify any limitations of the evaluation.
Make packaging preserve the stem and face orientation
Design the unit pack around the approved sample, including stem clearance. A tray or box that supports the body but loads the stem needs revision or validation; a neat digital mockup cannot establish protection.
Decide how the face should appear in a retail display. With a nearly rotationally symmetric pumpkin, uncontrolled rotation can hide the artwork. Test whether the proposed insert or pack orientation maintains visibility without rubbing the facial marks or leaving unacceptable surface impressions.
Keep private-label branding and required market information legible on the package. Confirm applicable requirements and product-specific documentation with responsible specialists. Neither a friendly face nor a supplier’s broad safety phrase proves that a particular project meets its intended market requirements.
Frequently asked questions
Can a standard pumpkin form be customized without new tooling?
Possibly, if an available form suits the approved shape and the changes are feasible. Ask the supplier to separate available-form customization from new geometry in the quotation; do not assume a mold is available from a category photograph.
Should facial details be molded or decorated?
Specify the intended approach rather than leaving the render to decide. Review feasibility, appearance and handling on the proposed physical sample. A surface graphic is not automatically a raised or recessed feature.
Does PU foam guarantee slow recovery?
No particular recovery time follows from the material name alone. Agree the proposed formulation, reference feel and evaluation conditions, then review the actual sample.
Can one approved face cover every artwork variant?
No. Differences in group size, line detail and groove overlap can change the result. Identify which variants need decorated samples and which checks apply to each.
Can these images serve as a manufacturing standard?
No. They illustrate appearance and review stages. Use supplier-confirmed drawings, agreed criteria and approved physical references for production decisions.
Request a custom PU pumpkin squishy project review
Send your selected pumpkin outline, groove map, stem direction, face artwork, W/D/H/Hb convention, quantity by variant, target market and pack concept. Mark what is fixed and what the supplier should propose. Review Dongyu’s customization service and request a custom PU pumpkin squishy review before committing to tooling or a seasonal delivery promise.